
检查压铸产品的完整性
视觉系统实现对铸件的铸造豆、浇口、浇铸道、浇铸通道和喂料器的正确状态等进行视觉检查。
该系统已经被大量应用。比如,在位于埃斯林根-梅廷根的梅赛德斯-奔驰工厂的压铸机上,以前,这是用几个起动器或光电接近开关来完成的。由于与铸件的距离很小,因此不仅存在较高的热负荷,而且还存在与部件碰撞的危险。此外,压铸机的铸造产品类型更换或刀具更换通常需要重新定位或扩展现有的传感器系统。现在,传统的方法已经被安装在安全距离的摄像系统所取代。
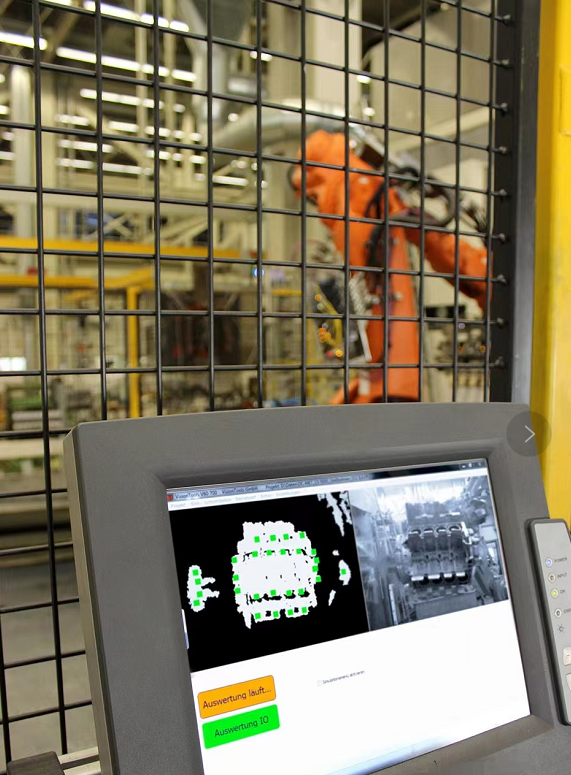
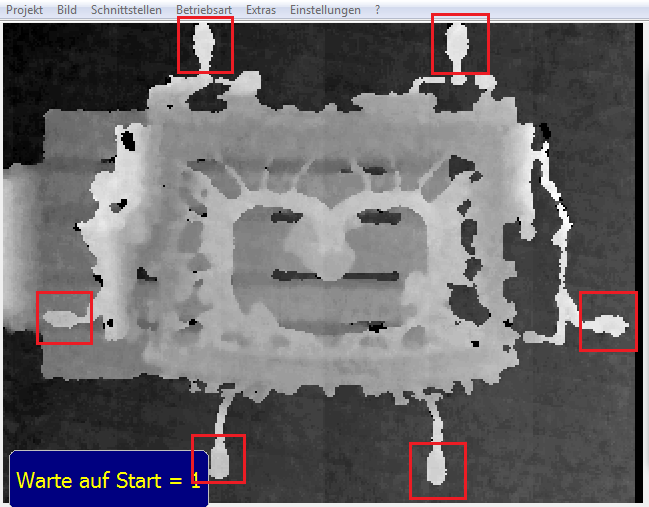
在大约1米的距离处安装了一个3D摄像机,以捕捉部件的几何结构。使用我们的图像分析软件进行评估。根据组件的大小和casting bean的位置,需要多副图像来检查所有的casting bean、缺口和熔渣。为此,机器人将组件移动在3D相机前面,走多个拍照位置,然后图像采集和评估0.3~1.2秒完成每个拍照位置的缺陷检测。控制系统会发送压铸件的型号和拍照检测位置编号给视觉,实现相应检测。
视觉系统可以管理任意数量的产品型号变体。采用我们的视觉系统,可以在不更改3D相机的情况下,实现支持产品型号的切换和刀具更换。为了实现这一点,软件为每个部件或检查位置定义特定的检查参数,然后将其与当前铸件的记录进行比较,并在出现偏差时发出告警消息。现在几乎可以完全避免压铸机因部件错误检测而停止运转。
Check die-cast products for completeness
At a die casting machine in the Mercedes-Benz plant in Esslingen-Mettingen, cast parts are checked for the correct condition of the casting beans, sprues, casting runs, casting channels and feeders.
Previously, this was done using several initiators or photoelectric proximity switches. As a result of the small distance to the casting, there is not only a high thermal load but also the danger of collision with the component. In addition, a type or tool change at the die casting machine usually requires the reorientation or extension of the existing sensor system.
Now the conventional method has been replaced by a camera system mounted at a safe distance.
A 3D camera was installed at a distance of approx. 1 meter to capture the component geometry. The evaluation is done with the image analysis software VisionTools V60. Depending on component size and bean position, several images are required to check all beans, slugs and sprues. For this purpose, the robot positions the component accordingly in front of the 3D camera. Image acquisition and evaluation takes between 0.3 and 1.2 seconds per component position. A type specification and specification of an check position number is made by the machine control system.
The system manages any number of type variants. The implementation of type and tool changes is only possible with the help of the VisionTools V60 image processing software and without changing the 3D camera. In order to achieve this, the software defines specific inspection characteristics once for each component or inspection position. These are then compared with the recording of the current cast product and an error message is issued in the event of deviations. A standstill of die casting machines due to faulty component checks can now be almost completely avoided.